Securely fixing Glass balustrade handrails to the wall
Glass Balustrades | Juliet Balconies | Galleries | Articles | Case Studies
Why fix the handrails to the wall?

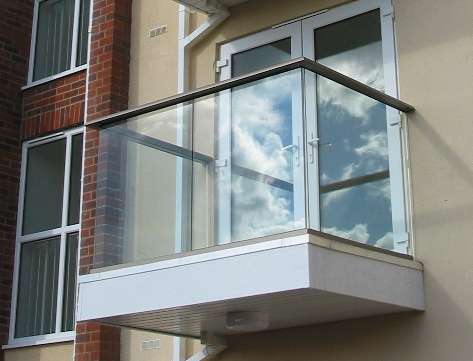
Here at Balcony Systems we like to think outside of the box and create innovative solutions. Our approach to the design of the balustrade is quite unique. We have designed our handrails to be structural members that directly resist the loads. The advantage of doing this is in reduction of the load compared with traditional post fixings. Therefore the ends of the glass balustrade are a very important element of the design.
By fixing the handrail back to walls you achieve an extremely strong and sturdy element with a much lighter solution than a cantilever glass or post system.
Methods of ending a balustrade run:
With our system you have two options to end the glass balustrade:
- Have it fixed to the wall or structure
- Have it end with an end post
We boast our ability to reach large spans of glass balustrades without posts, as much as 4.0m wide on Balcony 2 system for instance. In order to reach these maximum spans possible with the handrails they MUST be fixed at the end to the walls.
If you cannot for any reason fix the handrail to the walls or structure at the ends then you can choose to end the balustrade run on an end post. These end posts are exactly the same as any other of the posts that are employed on the system. In this way the end of the balustrade can be free from a fixing to the wall or to the structure. When ending on an end post this means that the handrail is not performing to its maximum capability structurally and cannot span the maximum loads.
This is explained in further detail in the video:
Data on exact loadings and what applied loadings on the fixings are can be found in our generic structural calculations but to explain the way we fix the handrail to the wall is by what we call wall brackets.
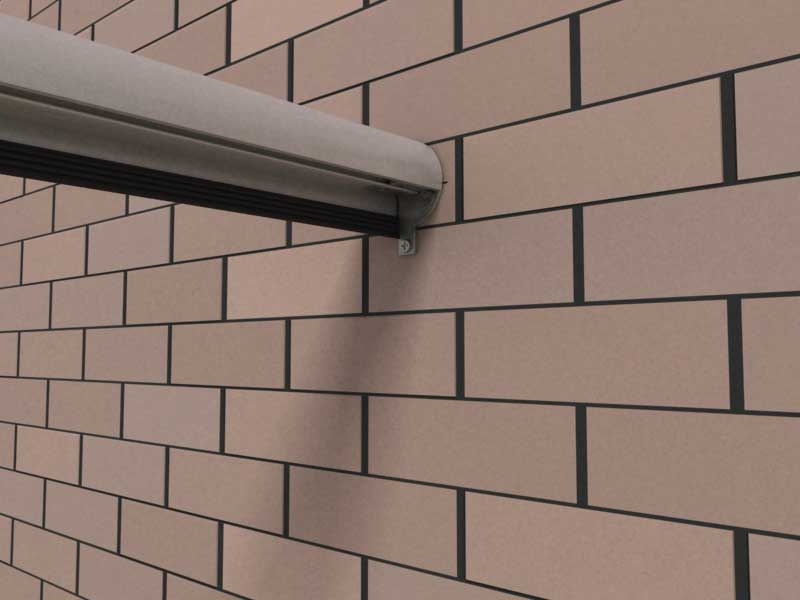
Fixing the handrail to the wall
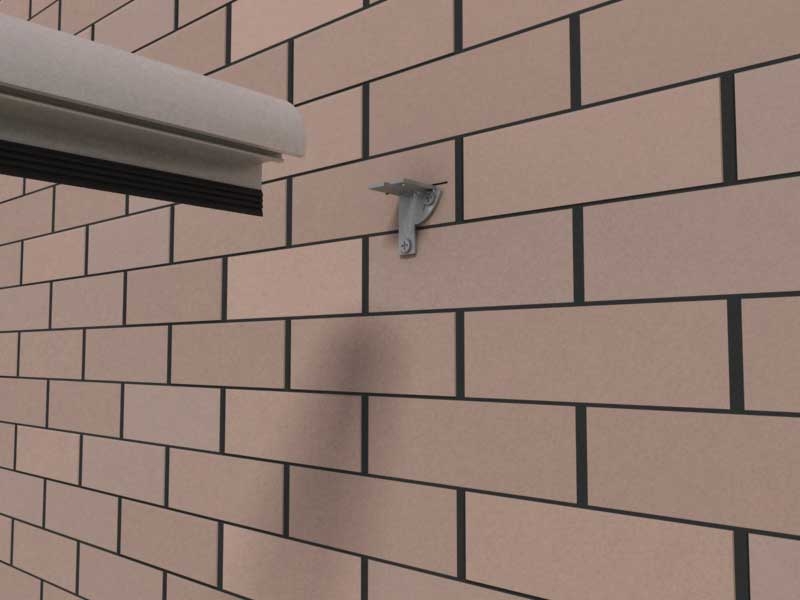
Both systems have wall brackets. On Balcony 2 these brackets sit on the part of the balustrade that is behind the glass. These are measured by the installer to be put at the correct height. They’re installed onto the wall properly and then the handrail is dropped on this wall fixing and fixed underneath using self-tapping screws from the handrail to the wall bracket, thereby fixing the handrail to the wall.
The fixing can be to the wall, it can be to another part of the structure, it can possibly be a steel member, a steel column, whatever it is, it needs to be fixed using our wall fixing into that element. It’s also possible to use a Juliet type bracket fixing, the same bracket that we use with the Juliet balconies. This again will create a proper and solid fixing to the wall or structure using the Juliet bracket in lieu of the wall bracket.
Types of wall fixings
With Balcony 1 we have two types of wall fixings. We have a concealed wall fixing and we have a wall fixing which is showing. The reason you cannot always use a concealed fixing is that sometimes when fixing between two walls at least one of the fixings has to be shown. This is because the concealed fixing requires you to overlap it and slot it onto the bracket laterally. This is not possible when you have a glass balustrade between two walls.
It is also possible that sometimes the system reaches the wall or the structure at an angle. This isn’t usually the case but we can overcome situations like this by making a special wall fixing. A special bracket that is shaped and when the handrail is cut at the correct angle it will still work and we can still fix to the wall and fix the handrail to the bracket. That is a special type of wall fixing where the handrail does not hit the structure or wall at 90 degrees but at a different angle.